

You can get a salon blowout at home in under 20 minutes. The secret is not technique alone; it is the right tools. A professional-grade dryer with ionic technology and a concentrator nozzle makes more difference than any brush trick. Once you have both, the steps are simple: prep properly, section your hair, work root to tip, and finish with a cool shot. Here is exactly how to do it.
In this article
- What is a salon blowout?
- What you need before you start
- Step-by-step: how to blowout your hair at home
- How to adapt the technique for your hair type
- How to make your blowout last longer
- Frequently asked questions
What exactly is a salon blowout?
A blowout is a voluminous, bouncy hairstyle created using a hair dryer and a brush, without needing a flat iron or curling wand. The aim is smooth, shiny, movement-filled hair that looks as though you have just stepped out of a salon. The difference between a standard home blow dry and a proper blowout comes down to two things: the tools and the tension. You are using the dryer and brush together to shape the hair as it dries, not just removing moisture.
What you need before you start
Getting the right result in under 20 minutes depends on having the right kit ready before you switch anything on.
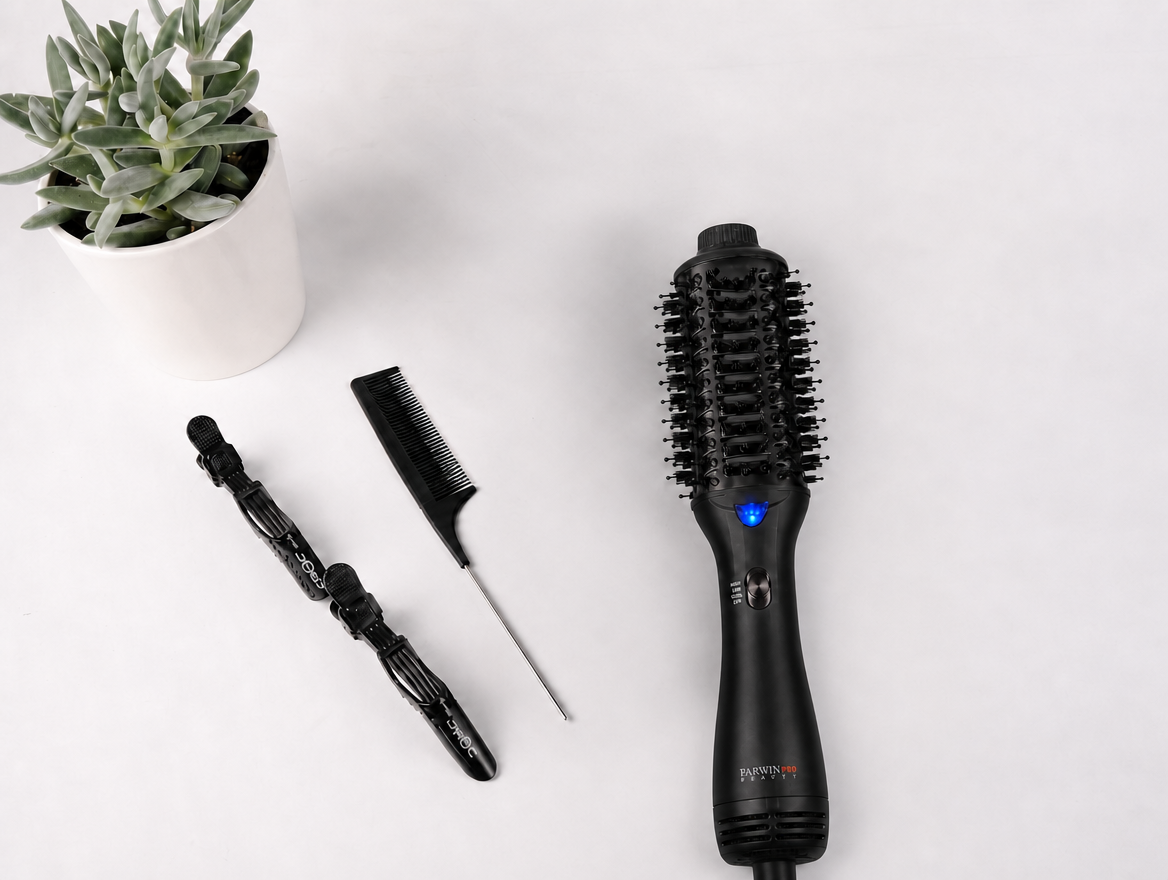
- A professional-grade hair dryer with ionic technology and a concentrator nozzle
- A round brush for volume and bounce, or a paddle brush for a sleeker, straighter finish
- Heat protectant spray, applied before any heat touches your hair
- Sectioning clips to divide your hair and work through it methodically
- A lightweight volumising product applied to damp roots for extra lift (optional, but helpful for fine hair)
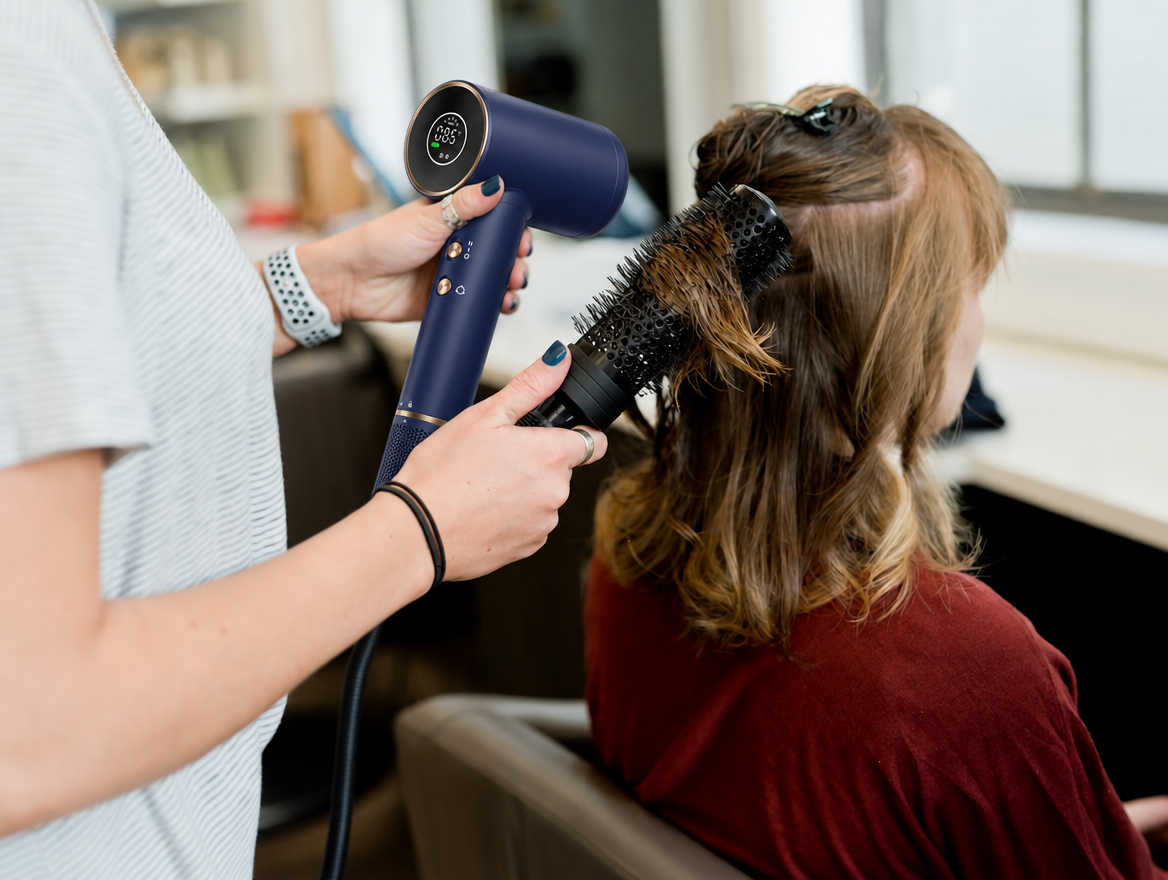
On the dryer: ionic technology is what separates a professional blowout from a standard one. Negative ions break down water molecules faster, so your hair dries more quickly with less heat exposure. The result is smoother, shinier hair with less frizz, in less time. A dryer without ionic technology is working against you; it takes longer and leaves hair fluffier.

110,000 RPM brushless motor. 200 million negative ions. Dries hair up to 3x faster than a standard dryer, without the heat damage.
Step-by-step: how to get a salon blowout at home
Step 1: Wash and towel-dry properly
Use a lightweight, volumising shampoo and conditioner suited to your hair type. Once out of the shower, blot (do not rub) your hair with a microfibre towel or an old cotton t-shirt to remove excess water without creating frizz. You want your hair around 70 to 80% dry before you pick up the dryer. Starting on soaking-wet hair wastes time and increases heat exposure unnecessarily.
Step 2: Apply heat protectant and any styling product
Work a heat protectant evenly through damp hair from mid-lengths to ends before any heat touches it. If you want extra volume, this is also the moment to apply a lightweight volumising mousse or spray to your roots. Avoid anything heavy on the lengths; it will weigh the blowout down.
Step 3: Section your hair into four parts
Divide your hair into four sections: two at the front, two at the back. Clip each section up and out of the way. Working in sections is the single biggest difference between a messy home blow dry and a polished salon finish. It ensures every section gets equal attention and dries evenly. If you have thick or long hair, divide each section in two for a total of eight.
Step 4: Start at the back, work root to tip
Begin at the nape of the neck, which is the hardest section to reach and the one most people leave half-dry. Take a section of hair, place your round brush underneath at the roots, and point the concentrator nozzle downward. Always dry in the direction of the cuticle, root to tip, to keep it smooth. Pull the brush slowly through the hair while following with the dryer. At the ends, rotate the brush inward to create the soft curl or flick that gives a blowout its bounce. Work through each section the same way.
Step 5: Finish with a cool shot
Once each section is fully dry and shaped, blast it with your dryer's cool shot for five to ten seconds. This sets the style in place and adds shine. Do not skip this step; it is what gives a salon blowout its hold and stops it drooping within an hour.
Step 6: Release and finish
Once all sections are done, release your hair and shake it out gently. If you want more volume, tip your head upside down briefly and scrunch the roots. Finish with a light mist of flexible-hold hairspray if you want extra longevity, then leave it alone. The more you touch it, the faster it drops.
How to adapt the technique for your hair type
| Hair type | Brush to use | Key tip |
|---|---|---|
| Fine or flat | Large round barrel | Lift roots aggressively and avoid product on the lengths |
| Thick or coarse | Medium round brush | Take smaller sections and use medium heat for longer to fully dry each one |
| Curly or wavy | Paddle brush or diffuser | Use a diffuser for natural texture, or a paddle brush with tension for a smoother stretch-out |
| Short or layered | Small round brush | Focus on root lift; the ends will shape quickly with a small barrel |
| Colour-treated | Any | Keep heat on medium; ionic technology reduces the need for high settings |

Dries and styles at the same time, ideal if you want a blowout without managing a separate brush. Great for shorter or medium-length hair.
How to make your blowout last longer
A good blowout should last two to three days with the right aftercare. A few things that make a real difference:
- Sleep on a silk or satin pillowcase. Cotton creates friction overnight that disturbs the cuticle and flattens volume. Silk keeps the style intact.
- Keep your hands off it. The oils from your fingers are the fastest way to break down the hold, so style it once and leave it.
- Dry shampoo at the roots on day two. It absorbs oil and revives volume without washing the style out.
- Go easy on product on the day. Heavy serums or oils weigh a blowout down within hours. Stick to a light heat protectant and a flexible-hold spray.

Frequently asked questions
How long does a blowout take at home?
With a professional-grade ionic dryer and properly sectioned hair, most people can complete a full blowout in 15 to 20 minutes. Fine or shorter hair will take less time; thick or very long hair may need 25 to 30 minutes. Using a standard dryer without ionic technology will add significant time to that.
Do I need a special brush for a blowout?
A round brush makes the biggest difference for achieving bounce and volume. Use a large barrel (40mm or above) for loose, voluminous results, or a smaller barrel for more defined curl at the ends. A paddle brush works well if you want a sleeker, straighter finish rather than bounce.
Can I do a blowout on curly or textured hair?
Yes. Use a paddle brush or comb attachment with your dryer to gently stretch and smooth the hair section by section. Ionic technology is especially useful for curly and textured hair as it reduces frizz and helps manage moisture. Apply a leave-in conditioner before you start and keep the heat on medium.
What is the cool shot button for?
The cool shot sends a burst of cold air over the section you have just dried. This sets the shape and closes the hair cuticle, adding shine and locking the style in place. Always use it at the end of each section; it is what stops a blowout falling flat within the first hour.
Is an ionic dryer really worth it for a home blowout?
Yes. Negative ions break down water molecules and reduce static, which means your hair dries faster, with less heat, and ends up noticeably smoother. The difference between a quality ionic dryer and a basic one is visible in the finish. You spend less time styling and get a better result.
How do I get volume at the roots?
Lift each section of hair up and away from the scalp as you dry it, directing the airflow at the roots first. Rotate the round brush upward at the root before pulling through to the ends. A volumising spray applied to damp roots before drying also helps, and the cool shot at the end sets the lift in place.
Ready to upgrade your blowout?
The Whisper Sonic Air delivers professional ionic results at a fraction of the salon price. Free UK shipping on orders over £40, backed by a 30-day money-back guarantee.
Shop the Whisper Sonic Air →1-year warranty. Free UK shipping over £40. 30-day money-back guarantee.